The Simple Guide to Preparing Your Home for Real Estate Photography
Selling your home can be a challenging process, but professional real estate photography can make a significant difference in attracting potential buyers and selling your home quickly. Photos attract buyers, and the foundation of a great real estate photo is a prepared home.
Yes, we can make your home look amazing and big with our cool light and space bending camera tricks and editing, but our tricks won’t fix/hide everything. When we arrive, we’ll take a few minutes to carefully walk around the home before taking any pictures in order to make light staging suggestions and adjustments, but the home should be pretty much photo ready when we arrive.
This stage in the home selling process can seem stressful, but in this guide, we'll share everything you need to know about preparing your home for real estate photography so stress is minimal and profits are maximal.
Point 1: Clean and declutter your home
Before the photo shoot, clean your home thoroughly. Pay special attention to reflective surfaces because things like fingerprints on fridges and glass, or footprints on glossy wood flooring show up very easily in photos. If you don’t have time to clean yourself, we are happy to recommend cleaning services in our local area!
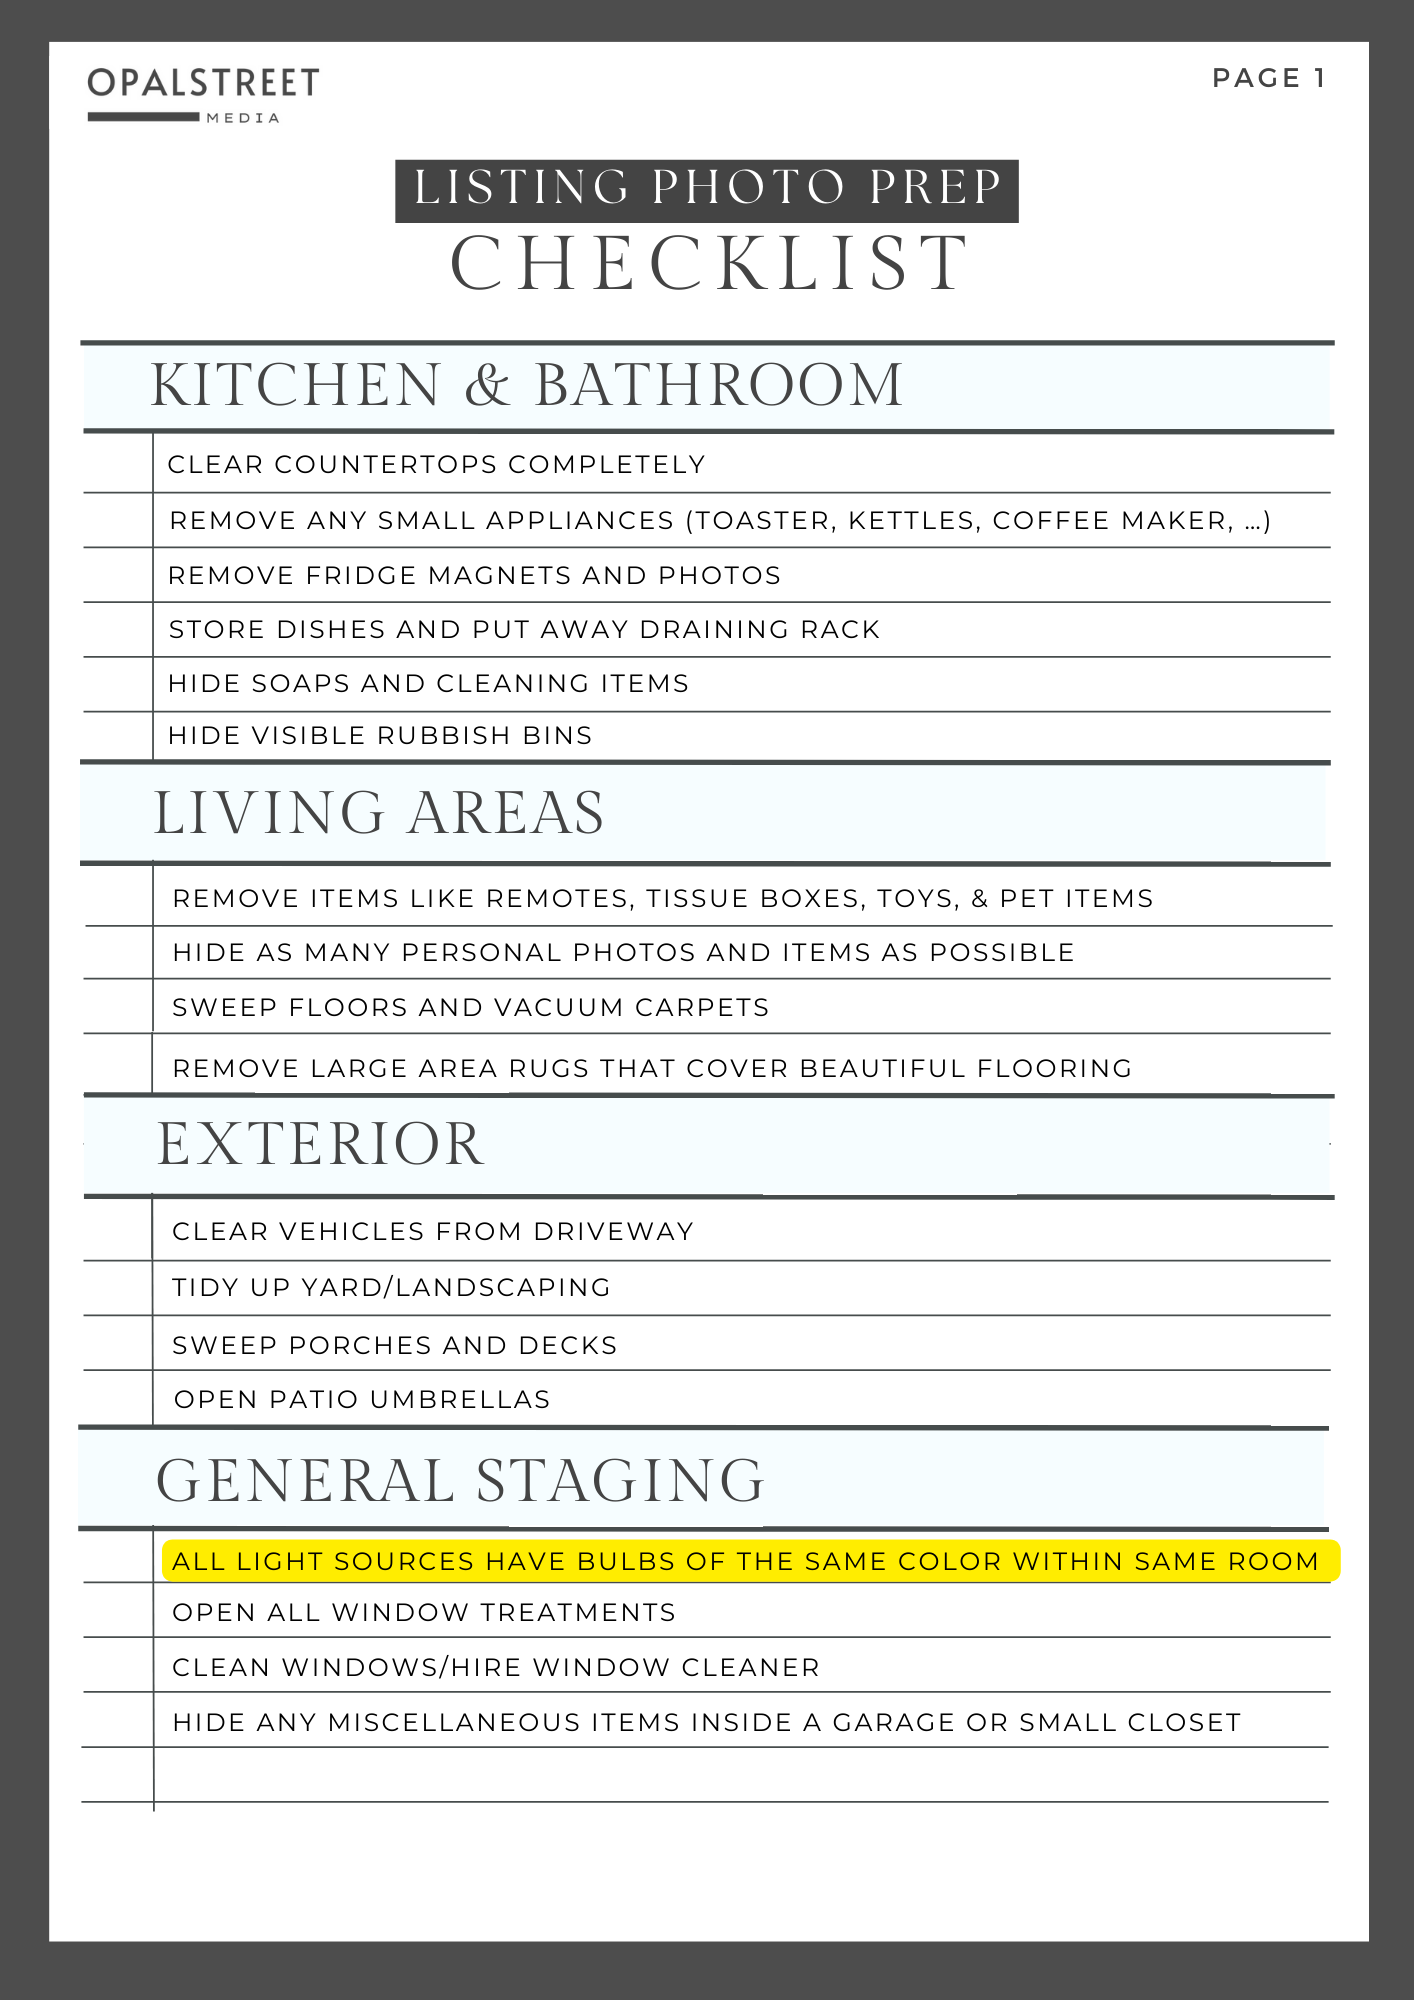
As far as decluttering, focus on removing any unnecessary items such as small appliances on kitchen counters, toothbrushes in the bathroom, and trashcans from the front view of the home. This will create a space that appears fresher, more appealing, and that more people could see themselves living in.
Grab for our free real estate photo home prep checklist that lays it all out for you:
Point 2: Remove Distractions
If possible, remove any distractions such as pet items, children’s toys, large family portraits, and anything that could draw attention away from the home's features.
Don’t forget the exterior! Be sure to remove cars from driveways so that buyers get a full, uninterrupted view of the exterior.
Pro tip: Use a small closet, garage, or attic to temporarily hide anything that’s needed before the shoot. Closets and the inside of garages aren’t often featured in real estate photos.
Point 3: Maximize Natural Light
Open all the blinds and curtains to allow natural light to flood the space. This will help create a warm and inviting atmosphere in your home and improve the photo quality.
Point 4: Harmonize Artificial Light
Lightbulbs come in many different colors aka temperatures. You may see terms like “soft white”, “daylight white”, or numbers such as “4800K” on your lightbulb labels. The biggest impact you could make for each individual room is to have all overhead lightbulbs within a living area be of the same temperature. This will greatly reduce unflattering off-colors in photographs and make the space feel nicer to be in when buyers tour.
Point 5: Complete any noticeable cosmetic repairs
Make sure all repairs and maintenance work have been completed before the photo shoot. This will help present your home in the best possible condition.
Point 6: Consider hiring a stager
Staging your home can help showcase its potential and make it more appealing to potential buyers. It can highlight your home’s special features and enhance the structural beauty. Consider hiring a professional stager or doing it yourself with tips from Youtube, for example.
As you can see, you can mix-and-match these options to figure out a plan that will work for you. At the end of the day, just remember that what’s in the home will end up in the photo. So take a look at the room from top to bottom as if you are an outside viewer. If you follow these tips and create a good foundation, your home will have incredible pictures and attract the right buyers.
Call OpalStreet Media to capture all your hard-work in the best way possible!


